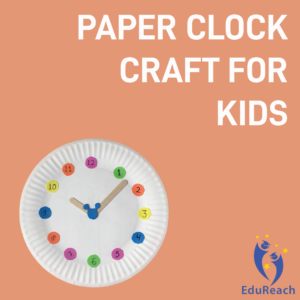
Paper Plate Clock Craft for Kids
With a paper plate clock, you can teach your child how to tell time. Most children can easily understand time with digital clocks but face a bit of a challenge learning to recognise time on an analogue clock. Although digital clocks are quite popular these days, analogue aren’t going away any time soon, and reading them is a skill a child will have to master. Help your kids stay ahead of the curve with this easy paper clock craft project, which is great to do at home or in the classroom.
Before we get started, here are the materials you will need for this craft:
- Paper plate (can be coloured or white)
- Craft paint
- Paintbrush
- Crayons, markers, or pens
- Cardstock
- Paper brad
- Number stickers (1 to 12)
- Glue stick
- Age-appropriate scissors
If you don’t have any of these materials, find another item to substitute it – be creative!
If you are using a plain white paper plate, you may paint it a colour of your choice, or you can keep it white. Your child might have fun decorating the paper plates in colours that they love.
If you want to save time, skip a step, and use a market to write on the paper plates inside of using stickers, Draw the numbers 12, 3, 6 and 9 around the inner edges of the plate with a marker, then fill in the rest of the numbers. This trick will keep the numbers evenly spaced around the plate – this goes for the stickers as well.
Now, we will make and attach the clock hands onto the paper plate.
Step 1: Draw two rectangles on a sheet of card stock. One rectangle should be long for the minute hand and the other rectangle should be shorter for the hour hand.
Step 2: Cut the rectangles out with scissors.
Step 3: Cut a point on one short edge of each rectangle with scissors.
Step 4: Turn the paper plate over and mark the center of the plate with a pen, pencil, or marker.
Step 5: Use the sharp point of the scissors to pierce a small hole in the center of the paper plate.
Step 6: Turn the plate over.
Step 7: Pierce small holes onto the square end of your clock hands and insert the paper brad.
Step 8: Insert the paper brad with the hands into the middle hole on top of the paper plate and pull the brad apart on the back to secure it to the paper plate. Make sure that the brad is loose enough to allow free movement of the clock hands.
Once the hands are attached, and the numbers are drawn on, you are done! If you want to, you can decorate your clock with paper flowers, buttons, washi tape, or whatever you feel like to make it look more fun. Be creative and use your imagination to make the clock special while having fun with your child.
Source: https://www.thesprucecrafts.com/paper-plate-clock-craft-4164110